The Battle of Cowpens was an American victory fought on January 17th, 1781, near the town of Cowpens in South Carolina during the American Revolutionary War. A force of Continental Army regulars and militia under Brigadier General Daniel Morgan defeated a British and Loyalist force under Lieutenant Colonel Banastre Tarleton in less than an hour, inflicting devastating casualties and effectively destroying one of the most feared British units in the southern theater. The battle is regarded as one of the most brilliantly planned engagements of the entire war and as a turning point in the southern campaign that helped lead to the final British defeat at Yorktown.
What Was the American Revolution?
The American Revolution was the political and military struggle through which the Thirteen Colonies broke free from British rule and established the United States of America. By 1781, the war in the northern colonies had settled into a stalemate, and Britain had shifted its focus to the south, hoping to exploit Loyalist support there and work its way northward to crush the rebellion. The Battle of Cowpens was a direct response to that strategy. The American victory not only stopped the British advance in South Carolina but set in motion a chain of events that led directly to the surrender at Yorktown and the end of the war.
Background – The British Southern Strategy
From 1779 onward, British military commanders pursued what became known as the Southern Strategy. After years of inconclusive fighting in the north, British General Henry Clinton shifted the main offensive effort to Georgia and the Carolinas. The British believed that Loyalist support was stronger in the south and that a successful campaign there could sever the southern states from the rest of the rebellion. The strategy enjoyed early success. The British captured Savannah, Georgia, in December of 1778, and scored major victories at Charleston, South Carolina, in May of 1780 and at Camden, South Carolina, in August of 1780, where they almost completely destroyed the American southern army.
Following the defeats, General George Washington sent General Nathanael Greene to take command of the surviving American forces in the south. Greene faced an army that was badly weakened, poorly supplied, and operating in difficult terrain against a well-organized British force under General Lord Charles Cornwallis. Greene made a bold and unconventional decision: he divided his small army into two separate forces, knowing the British could not chase both at once. He sent Brigadier General Daniel Morgan westward with roughly 300 Continental regulars and 700 militia to threaten the British backcountry positions and disrupt Cornwallis’s supply lines. Morgan was a grizzled frontier veteran who had led riflemen with distinction throughout the war and was one of the most effective battlefield commanders in the Continental Army.
Banastre Tarleton
The British officer sent to deal with Morgan was Lieutenant Colonel Banastre Tarleton, a 26-year-old cavalry commander whose name had become one of the most feared in the southern colonies. Tarleton led a mixed force of cavalry and infantry known as the British Legion, which included both regular British soldiers and American Loyalists. He had built a reputation for speed, aggression, and ruthlessness. At the Battle of Waxhaws in May of 1780, Tarleton’s forces were accused of killing American soldiers who had already surrendered, an atrocity that generated enormous outrage among Patriots and gave rise to the phrase “Tarleton’s Quarter,” meaning no mercy. His record of aggressive and often reckless attacks had been successful enough that Cornwallis trusted him completely.
When Cornwallis learned that Morgan was operating in the backcountry near the important Loyalist fort at Ninety-Six, he ordered Tarleton to find and destroy Morgan’s force. Tarleton pushed his men hard through the South Carolina countryside in cold, difficult conditions, covering large distances with little rest and food. By January 16th, 1781, his force of approximately 1,100 men was close enough to Morgan that a battle was imminent.
Morgan’s Tactical Plan
Morgan chose to make his stand at a place called Hannah’s Cowpens, a well-known cattle grazing area near the Broad River. The choice of ground was deliberate and clever. By placing his army with the rain-swollen Broad River behind him, Morgan eliminated the possibility of his own militia melting away into the woods when the fighting got heavy, which had been a persistent problem throughout the southern campaign. He understood that the river would force his men to fight. He also knew that Tarleton would attack immediately and aggressively without pausing to reconnoiter the ground, which Morgan intended to turn against him.
Morgan spent the night before the battle walking among his men, talking to soldiers, joking, and encouraging them. He was particularly attentive to the militia units, who had a habit of breaking and fleeing at the first contact with British regulars. Morgan gave them clear and achievable instructions: he asked them only to fire two well-aimed volleys at the advancing British, specifically targeting officers to strip the enemy infantry of its leadership, and then to withdraw in an orderly fashion behind the Continental lines. He told them plainly that he did not expect them to stand and fight like regulars. He just needed them to do their job and fall back in order.
Morgan arranged his forces in three lines. At the front he placed his best sharpshooters, many of them frontiersmen armed with rifles. Behind them he positioned the militia under Colonel Andrew Pickens, with instructions to fire their two volleys and withdraw around the left flank of the main line. The third and strongest line consisted of Continental regulars, the backbone of the army. Behind the hill, out of sight of the approaching British, Morgan positioned the cavalry of Lieutenant Colonel William Washington, a capable and aggressive commander who was a distant cousin of George Washington.
Major Events of the Battle of Cowpens
Tarleton arrived at Cowpens in the pre-dawn hours of January 17th, 1781. His men were exhausted, having marched through the night on little food and minimal sleep. Despite this, Tarleton immediately launched his attack without pausing to rest his men or properly survey the American positions. It was exactly what Morgan had predicted.
As the British advanced, the American sharpshooters in the front line opened fire, killing and wounding a number of officers before falling back as planned. The militia in the second line then fired their two volleys, targeting officers just as Morgan had instructed, before withdrawing around the left side of the Continental line. Tarleton’s men, seeing the American front lines pulling back, believed the battle was already won. Their line broke into a near-run as they pushed forward, losing formation in their eagerness to run down what they thought was a retreating enemy.
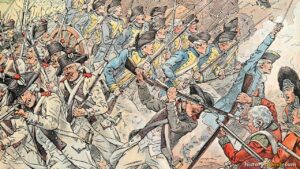
As the British infantry rushed forward and made contact with the Continental regulars, the disciplined American third line held firm. William Washington’s cavalry swept around behind the British right flank while Pickens’s militia, having completed their planned withdrawal, reformed and struck the British left. Morgan had achieved a double envelopment, trapping Tarleton’s entire force between multiple attacking forces from different directions simultaneously. The British formation collapsed entirely. Soldiers trying to surrender were at first attacked by their own comrades in the confusion before order was restored and the surrenders accepted. By eight in the morning, barely an hour after the battle had begun, it was over.
Casualties and Aftermath
The British losses were catastrophic. Approximately 110 men were killed, over 200 were wounded, and about 500 were captured, representing the near-total destruction of Tarleton’s force as a fighting unit. Only Tarleton himself and roughly 160 other men managed to escape. American losses were remarkably light, with approximately 12 killed and 60 wounded.
Morgan immediately began marching his force north with his British prisoners, correctly anticipating that Cornwallis would come after him in force. Morgan retired from active service shortly after the battle due to severe back pain that had plagued him throughout the campaign. The prisoners and captured weapons were turned over to other commanders as Morgan headed home.
When Cornwallis learned the scale of the defeat, he was shocked. Without Tarleton’s Legion to operate in the backcountry, Britain’s ability to control the interior of South Carolina was gone. Cornwallis stripped his army of its excess baggage to move faster and pursued Greene’s force into North Carolina. The two armies finally clashed at the Battle of Guilford Court House in March of 1781, a British tactical victory that left Cornwallis’s army so weakened and exhausted that he withdrew to Wilmington, North Carolina, to rest and refit. He then moved his army into Virginia, a decision that ultimately led to the trap at Yorktown in October of 1781 and the effective end of the war.
Significance of the Battle of Cowpens
The Battle of Cowpens is widely considered one of the most tactically brilliant engagements of the American Revolution. Morgan’s use of three defensive lines, his specific instructions to the militia, and his hidden cavalry reserve turned what could have been a rout into a perfect double envelopment that destroyed Tarleton’s force in under an hour. It demonstrated that American militia, properly deployed and given realistic expectations, could play a decisive role in defeating experienced British regulars.
Strategically, the battle broke the back of the British Southern Strategy. By forcing Cornwallis out of South Carolina and pushing him northward toward his eventual destruction at Yorktown, the Battle of Cowpens helped end the war. It stands alongside Saratoga and Yorktown as one of the three most important American victories of the Revolution.